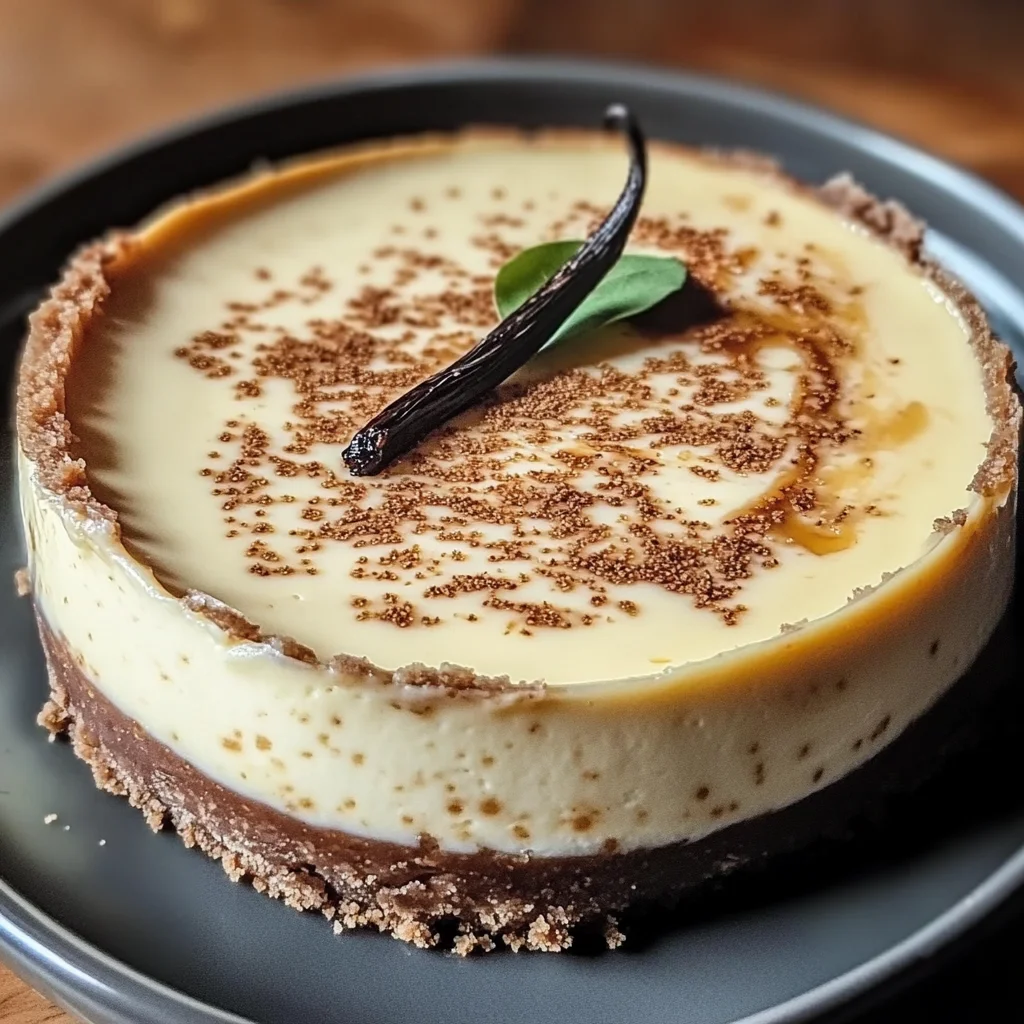
Vanilla Bean Brown Butter Cheesecake
If you’re looking for a dessert that captures the essence of comfort and indulgence, then you’ve stumbled upon the perfect recipe: Vanilla Bean Brown Butter Cheesecake. This creamy delight is my go-to for family gatherings, birthdays, or just those cozy evenings when you want something special. The blend of rich brown butter and aromatic vanilla bean creates a flavor that’s both deep and uplifting, making every slice feel like a warm hug.
What makes this cheesecake truly special is its buttery, crumbly crust that balances beautifully with the velvety filling. Trust me, once you taste it, you’ll understand why it has become a favorite in my home!
Why You’ll Love This Recipe
- Irresistible Flavor: The combination of brown butter and vanilla bean creates a unique taste that will have everyone asking for seconds.
- Easy to Prepare: With straightforward steps and simple ingredients, even novice bakers can master this recipe.
- Perfect for Any Occasion: Whether it’s a dinner party or a quiet night in, this cheesecake fits right in!
- Make-Ahead Friendly: This dessert can be prepared in advance, allowing you to enjoy your time with loved ones instead of being stuck in the kitchen.
- Family-Friendly Appeal: Kids and adults alike adore this cheesecake—it’s sure to please every palate!
Ingredients You’ll Need
Gathering the ingredients for this Vanilla Bean Brown Butter Cheesecake is easy! Each item is wholesome and contributes to that amazing flavor. Here are the simple ingredients you’ll need:
For the Crust
- 1 1/2 cups graham cracker crumbs
- 1/4 cup granulated sugar
- 1/2 teaspoon salt
- 1/2 cup unsalted butter, melted
For the Filling
- 3 (8 ounce) packages cream cheese, softened
- 1 1/4 cups granulated sugar
- 1 tablespoon all-purpose flour
- 1 teaspoon vanilla bean paste
- 1/2 teaspoon vanilla extract
- 3 large eggs
- 1/2 cup sour cream
- 1 teaspoon lemon juice
- 1/4 cup unsalted butter, browned
Variations
One of the best parts about this Vanilla Bean Brown Butter Cheesecake is how flexible it is! Feel free to get creative with these variations:
- Add Some Citrus: A splash of orange zest can brighten up the flavor profile.
- Chocolate Lovers Rejoice: Swirl in some melted chocolate into the batter before baking for a chocolatey twist!
- Nutty Crunch: Top your cheesecake with crushed nuts or a sprinkle of sea salt after baking for added texture.
- Seasonal Spices: Incorporate a hint of cinnamon or nutmeg to give it a seasonal touch during holidays.
How to Make Vanilla Bean Brown Butter Cheesecake
Step 1: Prepare the Crust
Preheat your oven to 325°F (163°C). Grease your 9-inch springform pan with butter or line it with parchment paper. In a medium bowl, combine graham cracker crumbs, granulated sugar, and salt. Add melted butter until everything looks like wet sand. Press this mixture evenly into the bottom of your pan. This step is essential as it forms the base that holds all that delicious filling together!
Step 2: Make the Filling
While your crust chills in the fridge, let’s whip up that dreamy filling! In a large mixing bowl, beat softened cream cheese on medium speed until smooth. Gradually add granulated sugar and flour; mix until everything is combined. Adding these dry ingredients helps prevent lumps later on—so take your time!
Step 3: Infuse with Flavor
Now it’s time to add those delightful flavors! Stir in vanilla bean paste and vanilla extract until smooth. Then, add eggs one at a time while mixing well after each addition. Scraping down the bowl ensures every bit gets incorporated for that creamy texture we’re after.
Step 4: Add Sour Cream and Lemon Juice
Mix in sour cream and lemon juice until smooth and creamy. The sour cream adds richness while balancing out sweetness with a little tang.
Step 5: Browning Butter Magic
In a small saucepan over medium heat, melt unsalted butter while swirling occasionally until golden brown and nutty. Allow it to cool slightly before drizzling into your cheesecake batter while mixing gently. This step really elevates our flavor game—trust me!
Step 6: Bake It Up!
Pour your cheesecake filling into the crust and spread evenly with a spatula. Tap gently on the counter to release air bubbles. Place on a baking sheet (to catch any drips) and bake for 55-60 minutes until edges are set but center jiggles slightly. After baking, turn off the oven and leave it ajar for an hour—this gradual cooling prevents cracks.
Step 7: Chill Out
Once cooled to room temperature, cover loosely with plastic wrap and refrigerate for at least four hours or overnight if possible! This chilling time allows flavors to meld beautifully.
Step 8: Serve Your Masterpiece
When ready to serve, carefully remove from springform pan onto a platter. Slice using a sharp knife (wiping between cuts) for neat slices. Enjoy chilled—every bite will be pure bliss!
With this Vanilla Bean Brown Butter Cheesecake recipe, you’ll have everyone raving about dessert! Happy baking!
Pro Tips for Making Vanilla Bean Brown Butter Cheesecake
Baking a perfect cheesecake can be a delightful adventure, and these tips will help you achieve a stunning result!
-
Use room temperature ingredients: Allowing your cream cheese and eggs to come to room temperature ensures they blend smoothly, preventing lumps in your cheesecake batter.
-
Don’t overmix the batter: Mixing the batter too much can incorporate excess air, leading to cracks as the cheesecake bakes. Mix just until combined for a smooth texture.
-
Use a water bath: For extra creaminess and to minimize cracking, place your springform pan in a larger baking dish filled with hot water during baking. This gentle heat helps maintain even temperatures.
-
Cool gradually: After baking, let the cheesecake cool slowly in the oven with the door ajar. This prevents sudden temperature changes that can cause cracks on the surface.
-
Chill overnight: While it’s tempting to dig in right away, letting your cheesecake chill overnight allows the flavors to meld beautifully, resulting in a more delicious dessert.
How to Serve Vanilla Bean Brown Butter Cheesecake
When it’s time to present this delightful cheesecake, think about how to enhance its beauty and flavor! Here are some creative ideas for serving.
Garnishes
- Fresh berries: A handful of strawberries, raspberries, or blueberries not only add a pop of color but also provide a refreshing tartness that balances the richness of the cheesecake.
- Whipped coconut cream: A dollop of lightly sweetened coconut cream adds an airy texture and complements the flavors of vanilla and brown butter beautifully.
- Chocolate shavings: For an elegant touch, sprinkle some dark chocolate shavings on top for added flavor and visual appeal.
Side Dishes
- Fruit salad: A light fruit salad with seasonal fruits offers a fresh contrast to the rich cheesecake, making it a perfect companion for your dessert.
- Coffee or espresso: The bold flavors of coffee or espresso create an excellent pairing with cheesecake, enhancing its sweetness while providing a nice balance.
- Almond biscotti: These crunchy treats make for a delightful textural contrast and are perfect for dipping into coffee or enjoying alongside each creamy bite.
- Vanilla ice cream: A scoop of vanilla ice cream brings an extra layer of indulgence. The cold creaminess melts beautifully against the warm notes of brown butter in your cheesecake.
Now you’re all set to whip up this irresistible Vanilla Bean Brown Butter Cheesecake! Enjoy every luscious bite as you share it with friends and family. Happy baking!
Make Ahead and Storage
This Vanilla Bean Brown Butter Cheesecake is perfect for meal prep, allowing you to indulge in a delicious dessert without the last-minute rush. With a little planning, you can make this treat ahead of time and store it properly to keep it fresh and delightful.
Storing Leftovers
- Store leftover cheesecake in the refrigerator.
- Cover loosely with plastic wrap or transfer to an airtight container.
- Enjoy within 5-7 days for the best flavor and texture.
Freezing
- Slice the cheesecake into individual portions for easier thawing.
- Wrap each slice tightly in plastic wrap, then place in a freezer-safe bag or container.
- Freeze for up to 2 months. When ready to enjoy, thaw in the refrigerator overnight.
Reheating
- Cheesecake is best served chilled; however, if you prefer it at room temperature:
- Remove from the refrigerator and let sit for about 30 minutes before serving.
- Avoid microwaving, as it can alter the texture.
FAQs
Here are some common questions you might have about making this Vanilla Bean Brown Butter Cheesecake.
Can I use regular butter instead of brown butter?
Yes! While brown butter adds a unique nutty flavor, you can substitute it with regular unsalted butter if preferred. Just melt it as directed in the recipe.
How do I know when my Vanilla Bean Brown Butter Cheesecake is done?
The cheesecake is done when the edges are set but the center still jiggles slightly. It will continue to firm up as it cools.
What makes this Vanilla Bean Brown Butter Cheesecake different from regular cheesecake?
The use of brown butter introduces a rich, nutty flavor that complements the creamy texture and aromatic vanilla bean, creating a uniquely delicious dessert experience.
Can I customize this cheesecake with toppings?
Absolutely! Fresh fruit, chocolate shavings, or a drizzle of caramel sauce can elevate your Vanilla Bean Brown Butter Cheesecake even further. Get creative!
Final Thoughts
I hope you enjoy making this Vanilla Bean Brown Butter Cheesecake as much as I do! It’s truly a special dessert that brings warmth and joy to any gathering or cozy night in. So gather your ingredients, embrace your inner baker, and savor every delicious bite. Happy baking!
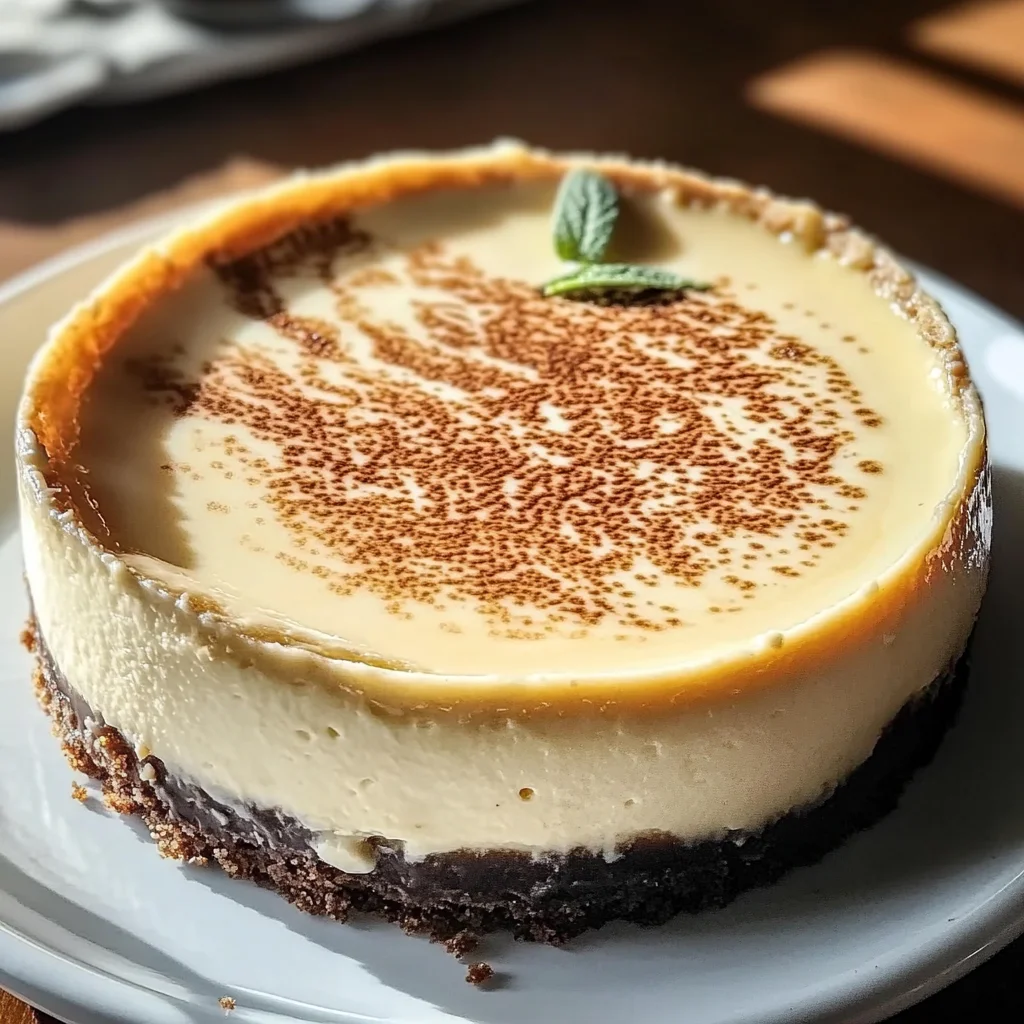
Vanilla Bean Brown Butter Cheesecake
Indulge in the creamy delight of Vanilla Bean Brown Butter Cheesecake, a dessert that seamlessly blends rich flavors and smooth textures. This elegant cheesecake features a buttery, crumbly crust that perfectly balances the velvety filling infused with aromatic vanilla bean and nutty brown butter. Ideal for family gatherings, special celebrations, or quiet evenings at home, this cheesecake will leave everyone asking for seconds. With its easy preparation and make-ahead convenience, you can focus on enjoying your time with loved ones while savoring each delectable bite.
- Prep Time: 30 minutes
- Cook Time: 60 minutes
- Total Time: 1 hour 30 minutes
- Yield: Approximately 12 servings 1x
- Category: Dessert
- Method: Baking
- Cuisine: American
Ingredients
- 1 1/2 cups graham cracker crumbs
- 1/4 cup granulated sugar
- 1/2 teaspoon salt
- 1/2 cup unsalted butter, melted
- 3 (8 ounce) packages cream cheese, softened
- 1 1/4 cups granulated sugar
- 1 tablespoon all-purpose flour
- 1 teaspoon vanilla bean paste
- 1/2 teaspoon vanilla extract
- 3 large eggs
- 1/2 cup sour cream
- 1 teaspoon lemon juice
- 1/4 cup unsalted butter, browned
Instructions
- Preheat your oven to 325°F (163°C) and prepare a greased springform pan.
- In a bowl, mix graham cracker crumbs, sugar, salt, and melted butter until crumbly. Press into the bottom of the pan.
- Beat cream cheese until smooth; gradually add sugar and flour.
- Mix in vanilla bean paste and extract; add eggs one at a time until combined.
- Incorporate sour cream and lemon juice until smooth.
- Brown unsalted butter in a saucepan; drizzle into the batter and mix gently.
- Pour filling into the crust; bake for 55–60 minutes until set around the edges but slightly jiggly in the center.
- Cool gradually in the oven with the door ajar; refrigerate for at least four hours before serving.
Nutrition
- Serving Size: 1 slice (90g)
- Calories: 360
- Sugar: 29g
- Sodium: 230mg
- Fat: 26g
- Saturated Fat: 15g
- Unsaturated Fat: 10g
- Trans Fat: 0g
- Carbohydrates: 29g
- Fiber: 0g
- Protein: 6g
- Cholesterol: 80mg