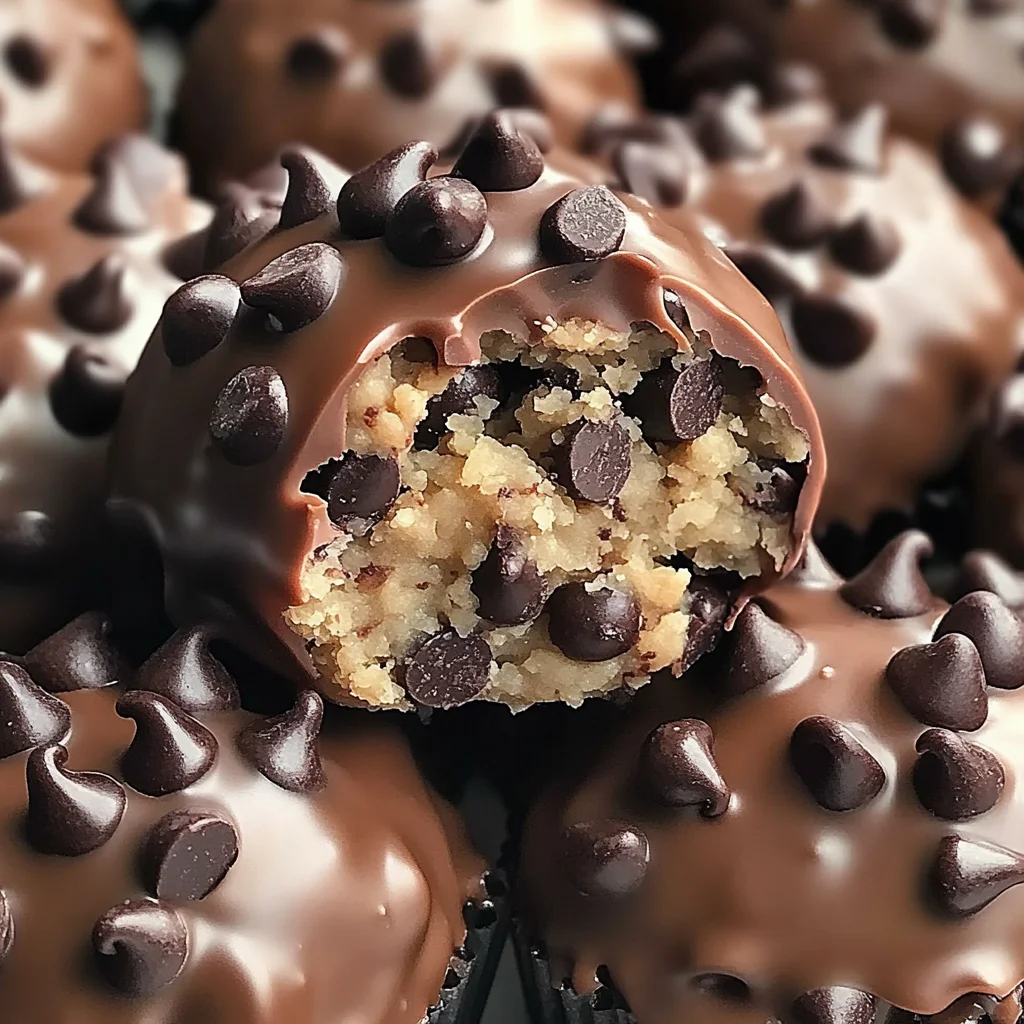
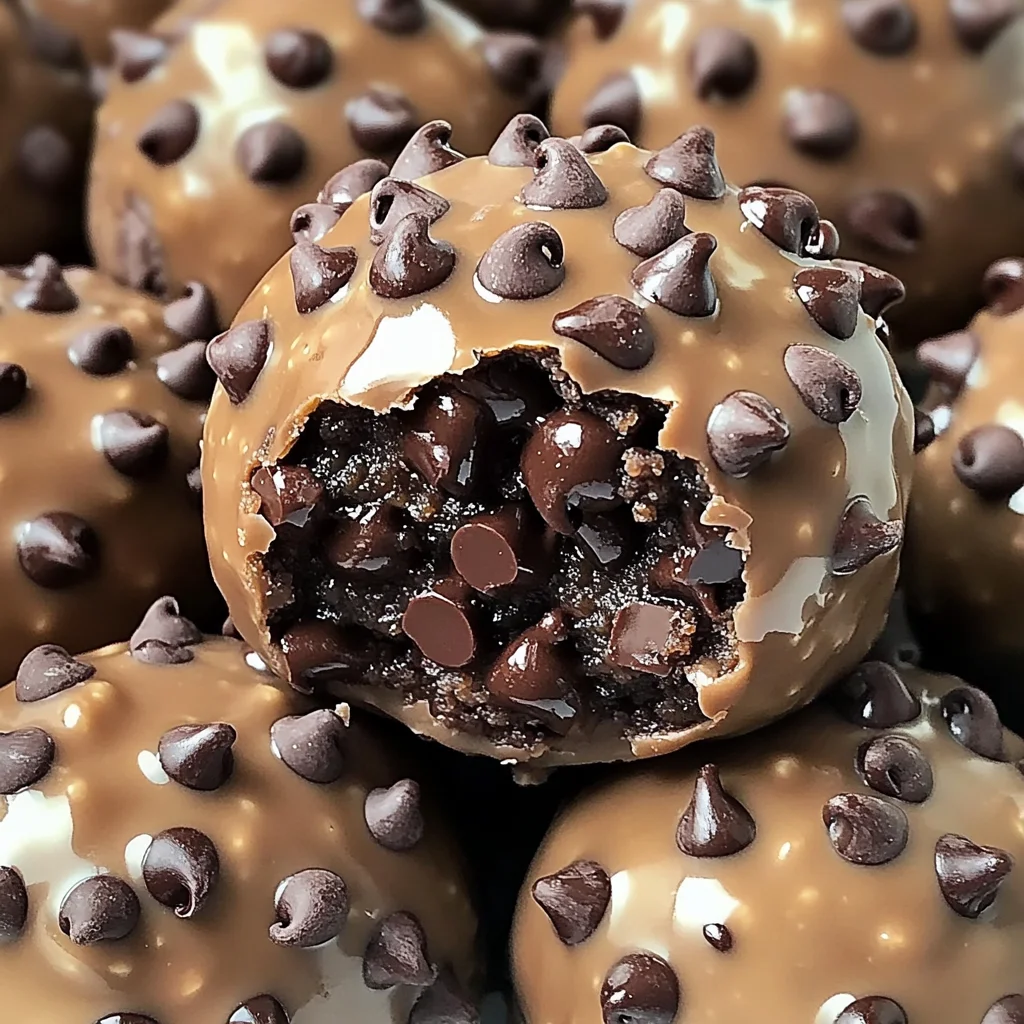
Chocolate Chip Cookie Dough Protein Balls!
If you’re looking for a delicious treat that feels indulgent but is actually packed with protein, then you’ve come to the right place! These Chocolate Chip Cookie Dough Protein Balls! are not only easy to make, but they also satisfy that sweet tooth without any guilt. Trust me, once you try these little bites of heaven, they’ll become a favorite in your home.
These no-bake goodies are perfect for busy weeknights when you need a quick snack or for family gatherings where everyone will be asking for more. Plus, they keep well in the fridge, making them an ideal make-ahead treat. Let’s dive into why you’ll love this recipe!
Why You’ll Love This Recipe
- Quick and Easy: You can whip these up in under an hour with minimal effort—perfect for those last-minute cravings!
- Healthy Twist: Enjoy the flavor of cookie dough without the guilt. These protein balls are packed with wholesome ingredients.
- Family-Friendly: Kids will love the taste, and you’ll love knowing they’re getting a healthy snack.
- Customizable: Feel free to mix it up! Add your favorite nuts or seeds for a personal touch.
- Meal Prep Friendly: Make a batch ahead of time and have snacks ready to grab throughout the week.
Ingredients You’ll Need
Making these Chocolate Chip Cookie Dough Protein Balls! is a breeze thanks to simple and wholesome ingredients. Here’s what you need:
For the Cookie Dough Bites:
- 1 cup almond flour (or oat flour)
- 1/2 cup vanilla protein powder (whey, casein, or plant-based)
- 1/4 cup cashew butter (or almond/sunflower seed butter)
- 2-3 tbsp milk (dairy or non-dairy)
- 1/4 cup mini chocolate chips (plus extra for topping)
- 2 tbsp honey or maple syrup
- 1 tsp vanilla extract
- Pinch of salt
- 1 cup milk chocolate chips
- 1 tsp coconut oil (or vegetable oil)
Variations
The beauty of these protein balls lies in their flexibility! Feel free to experiment with different ingredients based on what you have on hand or your taste preferences.
- Swap the nut butter: Use almond or sunflower seed butter instead of cashew butter for a different flavor profile.
- Change the sweetener: Experiment with agave syrup or even stevia if you’re looking for lower-sugar options.
- Add some crunch: Toss in some chopped nuts like walnuts or pecans for added texture.
- Make them vegan: Use plant-based protein powder and maple syrup to keep them vegan-friendly!
How to Make Chocolate Chip Cookie Dough Protein Balls!
Step 1: Mix Dry Ingredients
In a medium bowl, whisk together the almond flour, protein powder, and pinch of salt. This step is important because it ensures all dry ingredients are well combined before adding anything wet. It helps achieve that perfect cookie dough texture later on!
Step 2: Mix Wet Ingredients
In another bowl, stir together the cashew butter, 2 tablespoons of milk, honey (or maple syrup), and vanilla extract until smooth. This mixture brings creaminess and sweetness to our protein balls and makes everything blend beautifully.
Step 3: Combine
Now it’s time to bring both mixtures together! Add the wet mixture into the dry ingredients and mix well until fully combined. This creates that lovely doughy consistency we all crave when thinking about cookie dough.
Step 4: Fold in Chocolate Chips
Gently fold in those mini chocolate chips. They add delightful bursts of chocolatey goodness throughout each bite! Be careful not to overmix; we want those chunks intact.
Step 5: Adjust Consistency
If your dough feels too dry, don’t worry! Add the remaining tablespoon of milk gradually until it reaches a slightly sticky but firm consistency. This step is crucial because we want our protein balls to hold their shape without being too gooey.
Step 6: Shape
Roll your mixture into 1-inch balls and place them on a parchment-lined plate. It’s fun to shape these little bites; think of it as your own mini workout while creating something delicious!
Step 7: Chill
Place them in the refrigerator for at least 30 minutes. Chilling allows them to firm up nicely so they’re easy to coat with chocolate later.
Step 8: Melt Chocolate
Microwave the milk chocolate chips along with coconut oil in 30-second intervals, stirring in between until smooth. Melting chocolate can be tricky; stirring frequently helps prevent burning!
Step 9: Dip
Coat each chilled protein ball in melted chocolate, tapping off any excess chocolate gently. This step adds another layer of richness that takes these bites over the top!
Step 10: Sprinkle & Set
Sprinkle extra mini chocolate chips on top while the chocolate is still wet. Then refrigerate again for about 15-20 minutes until set. This final touch ensures you get that beautiful look while adding even more chocolaty goodness.
Step 11: Serve & Store
Enjoy these tasty treats chilled! They store well in an airtight container in the fridge for up to a week—if they last that long!
And there you have it—your very own batch of Chocolate Chip Cookie Dough Protein Balls! Perfect as snacks or desserts anytime you need something sweet yet nutritious. Enjoy every bite!
Pro Tips for Making Chocolate Chip Cookie Dough Protein Balls!
Creating the perfect Chocolate Chip Cookie Dough Protein Balls can be a delightful experience, and with these pro tips, you’ll be on your way to making the best batch yet!
-
Choose the Right Flour: Opting for almond flour or oat flour enhances the texture and flavor, giving your protein balls that authentic cookie dough feel while keeping them gluten-free.
-
Adjust Sweetness to Taste: The amount of honey or maple syrup can be tailored to your preference; start with 2 tablespoons and add more if you like it sweeter. This flexibility ensures that the protein balls suit your taste buds perfectly.
-
Consistency is Key: If your dough feels too dry, don’t hesitate to add more milk slowly until you achieve that perfect sticky-but-firm consistency. This helps create a chewy texture that mimics real cookie dough.
-
Chill for Better Texture: Allowing the protein balls to chill in the refrigerator helps them firm up and makes them easier to dip in chocolate. Plus, they taste even better when served cold!
-
Experiment with Mix-Ins: Feel free to mix in other ingredients like shredded coconut or different types of nut butter for a unique twist. This not only adds variety but also boosts nutrition and flavor.
How to Serve Chocolate Chip Cookie Dough Protein Balls!
These delightful protein balls are not only easy to make but also versatile when it comes to serving. Here are some fun ideas on how to present them!
Garnishes
- Extra Mini Chocolate Chips: Sprinkle additional mini chocolate chips on top right after dipping in chocolate for an extra touch of sweetness and visual appeal.
- Cocoa Powder Dusting: A light dusting of cocoa powder can enhance the chocolate flavor and add a sophisticated look.
Side Dishes
- Fresh Fruit: Pair your protein balls with sweet seasonal fruits like strawberries or apple slices for a refreshing contrast.
- Nut Butter Dip: Serve with a small bowl of almond or cashew butter for an extra creamy dip that complements the chocolate perfectly.
- Smoothies: A green smoothie or banana smoothie provides a nutritious beverage option alongside these protein-packed bites, making for a well-rounded snack.
- Yogurt Parfait: Layer some yogurt with granola and fresh fruits as a side dish that pairs wonderfully with the rich flavors of the protein balls.
These presentations will not only impress your family and friends but also elevate your snacking experience! Enjoy every bite!
Make Ahead and Storage
These Chocolate Chip Cookie Dough Protein Balls are perfect for meal prep, allowing you to have a quick, nutritious snack on hand whenever you need one. They store well in the fridge or freezer, making them a convenient treat for busy days!
Storing Leftovers
- Store the protein balls in an airtight container in the fridge.
- They will stay fresh for up to a week.
- Ensure they are fully cooled before sealing to prevent moisture buildup.
Freezing
- For longer storage, place the protein balls in a single layer on a baking sheet and freeze until solid.
- Once frozen, transfer them to a zip-top bag or airtight container.
- They can be stored in the freezer for up to three months.
Reheating
- These protein balls are best enjoyed chilled or at room temperature.
- If you prefer them warm, microwave them for about 10-15 seconds before serving.
FAQs
Here are some common questions about making Chocolate Chip Cookie Dough Protein Balls!
Can I make Chocolate Chip Cookie Dough Protein Balls vegan?
Yes! Simply use plant-based protein powder and substitute honey with maple syrup for a delicious vegan option.
How long do Chocolate Chip Cookie Dough Protein Balls last?
When stored properly in an airtight container in the fridge, they can last up to a week. For longer storage, consider freezing them!
Are Chocolate Chip Cookie Dough Protein Balls healthy?
Absolutely! They are packed with protein and made from wholesome ingredients, making them a great healthy snack or dessert option.
Can I substitute almond flour in Chocolate Chip Cookie Dough Protein Balls?
Yes! You can use oat flour or any nut-free flour alternative if you have allergies or dietary preferences.
How do I adjust the sweetness of my Chocolate Chip Cookie Dough Protein Balls?
Feel free to add more honey or maple syrup if you like them sweeter. Just keep in mind that it may alter the texture slightly.
Final Thoughts
I truly hope you enjoy making these delightful Chocolate Chip Cookie Dough Protein Balls! They’re not only satisfying but also a healthier way to indulge your sweet tooth. Whether you’re preparing snacks for the week or just treating yourself, these little bites of joy will surely bring a smile to your face. Enjoy every bite and happy snacking!
Chocolate Chip Cookie Dough Protein Balls
Indulge in the rich, satisfying flavors of our Chocolate Chip Cookie Dough Protein Balls! These no-bake treats offer all the deliciousness of cookie dough while being packed with protein and wholesome ingredients. Perfect for a quick snack or a guilt-free dessert, they are easy to make and customizable to fit your taste. With just a handful of ingredients and minimal prep time, you’ll have a nutritious treat that kids and adults alike will love. Plus, they store well in the fridge, making them an ideal option for meal prep. Dive into this delightful recipe that combines health and indulgence in every bite!
- Prep Time: 15 minutes
- Cook Time: 0 minutes
- Total Time: 15 minutes
- Yield: Approximately 12 servings 1x
- Category: Dessert
- Method: No-bake
- Cuisine: American
Ingredients
- 1 cup almond flour (or oat flour)
- 1/2 cup vanilla protein powder (plant-based recommended)
- 1/4 cup cashew butter (or almond/sunflower seed butter)
- 2–3 tbsp milk (dairy or non-dairy)
- 1/4 cup mini chocolate chips
- 2 tbsp honey or maple syrup
- 1 tsp vanilla extract
- Pinch of salt
- 1 cup milk chocolate chips
- 1 tsp coconut oil (or vegetable oil)
Instructions
- In a medium bowl, whisk together almond flour, protein powder, and salt.
- In another bowl, mix cashew butter, milk, honey (or maple syrup), and vanilla until smooth.
- Combine both mixtures until well blended.
- Gently fold in mini chocolate chips without overmixing.
- Adjust consistency with more milk if necessary.
- Roll into 1-inch balls and place on a parchment-lined plate.
- Chill in the refrigerator for at least 30 minutes to firm up.
- Melt additional milk chocolate chips with coconut oil; dip each ball and sprinkle with extra mini chocolate chips.
- Refrigerate again until set.
Nutrition
- Serving Size: 1 ball (25g)
- Calories: 100
- Sugar: 5g
- Sodium: 30mg
- Fat: 5g
- Saturated Fat: 1g
- Unsaturated Fat: 4g
- Trans Fat: 0g
- Carbohydrates: 10g
- Fiber: 2g
- Protein: 5g
- Cholesterol: 0mg